完整安装PHPmyadmin共包含三个大步骤:
安装Mysql server
安装Apache
安装PHPmyadmin
第一步、安装Mysql server
这一步参考在Linux下安装Mysql[附]
第二步、安装apache
在终端(Terminal)中输入下面的安装命令即可:
$ sudo apt-get update
$ sudo apt-get install apache2
检查Apache是否已经正确安装,只需在浏览器中输入你安装Apache的机器的IP地址,出现Apache页面,并有“It works”字样即可。
下面的命令可以查看你Apache服务器的IP地址:
$ ifconfig eth0 | grep inet | awk '{ print $2 }
第三步、安装Phpmyadmin
在命令行输入命令:
$ sudo apt-get update
$ sudo apt-get install phpmyadmin php-mbstring php-gettext
在安装过程中会询问你一些问题:
第一个弹出的问题: 要用空格Space选中他们才能Enter继续
第二个弹出的问题:问你是否使用dbconfig-common来配置数据库,然后让你输入之前安装的mysql的密码
然后,会让你配置你的PHPmyadmin的密码和确认密码
安装的过程会将PHPmyadmin和Apache的配置文件写入到/etc/apache2/conf-enabled/目录下,在PHPmyadmin和Apache运行的时候会自动从这里读取配置信息。
接下来是激活PHP的mcrypt和mbstring扩展,通过下面的命令:
$ sudo phpenmod mcrypt
$ sudo phpenmod mbstring
然后重启Apache:
$ sudo systemctl restart apache2
通过浏览器访问:
https://domain_name_or_IP/phpmyadmin
登录页面的账号密码就是上面设置过的。
(可选步骤)
Step Two — Secure your phpMyAdmin Instance
We were able to get our phpMyAdmin interface up and running fairly easily. However, we are not done yet. Because of its ubiquity, phpMyAdmin is a popular target for attackers. We should take extra steps to prevent unauthorized access.
One of the easiest way of doing this is to place a gateway in front of the entire application. We can do this using Apache’s built-in .htaccess authentication and authorization functionalities.
Configure Apache to Allow .htaccess Overrides
First, we need to enable the use of .htaccess file overrides by editing our Apache configuration file.
We will edit the linked file that has been placed in our Apache configuration directory:
sudo nano /etc/apache2/conf-available/phpmyadmin.conf
We need to add an AllowOverride All directive within the
附:在ubuntu下安装mysql
ubuntu上安装MySQL非常简单只需要几条命令就可以完成。
sudo apt-get install mysql-server
sudo apt-get install mysql-client
sudo apt-get install libmysqlclient-dev
安装过程中会提示设置密码什么的,注意设置了不要忘了,安装完成之后可以使用如下命令来检查是否安装成功:
sudo netstat -tap | grep mysql
通过上述命令检查之后,如果看到有mysql 的socket处于 listen 状态则表示安装成功。
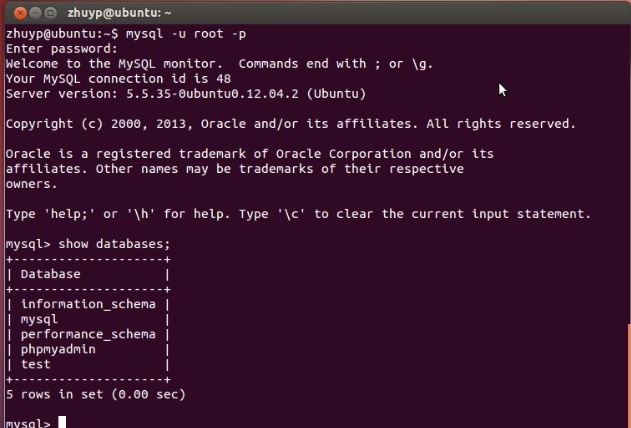
登陆mysql数据库可以通过如下命令:
mysql -u root -p
-u 表示选择登陆的用户名, -p 表示登陆的用户密码,上面命令输入之后会提示输入密码,此时输入密码就可以登录到mysql。
然后通过 show databases; 就可以查看当前的数据库。
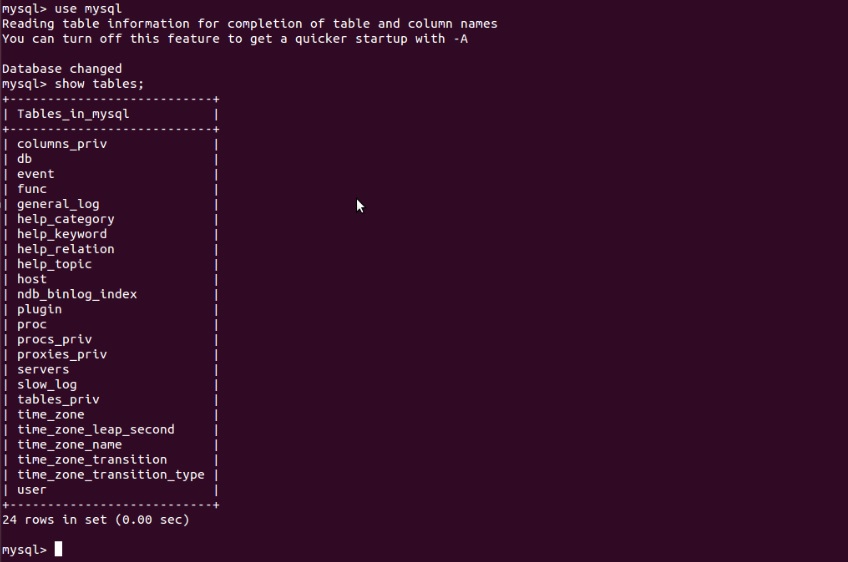
我们选择 mysql数据库就行下一步操作,使用use mysql 命令,显示当前数据库的表单:show tables
写一个简单的程序来访问该数据库,实现 show tables 功能:
#include
#include
#include
int main()
{
MYSQL *conn;
MYSQL_RES *res;
MYSQL_ROW row;
char server[] ="localhost";
char user[] ="root";
char password[] ="mima";
char database[] ="mysql";
conn = mysql_init(NULL);
if (!mysql_real_connect(conn, server,user, password, database, 0, NULL, 0))
{
fprintf(stderr,"%s\n", mysql_error(conn));
exit(1);
}
if (mysql_query(conn,"show tables"))
{
fprintf(stderr,"%s\n", mysql_error(conn));
exit(1);
}
res = mysql_use_result(conn);
printf("MySQL Tables in mysql database:\n");
while ((row = mysql_fetch_row(res)) != NULL)
{
printf("%s \n", row[0]);
}
mysql_free_result(res);
mysql_close(conn);
printf("finish! \n");
return 0;
}
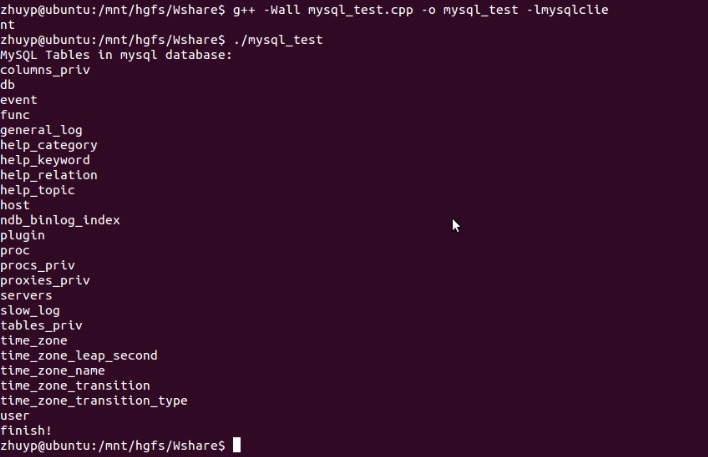
编译代码的时候需要链接mysql的库,可以通过如下方式编译:
g++ -Wall mysql_test.cpp -o mysql_test -lmsqlclient
然后运行编译好的代码:
可见结果和使用SQL语句 show tables 是一样的。
make it simple, make it happen


